


ENGAgements
tips for brides
editorial
weddings
categories
And thanks for stopping by! My work reflects my desire to add some whimsy, enchantment and beauty to the world. It is my way of sharing a bit of my heart. I love the laughter and smiles, but I am also drawn to the quiet, intimate moments that are filled with emotion. My goal is to capture the essence of your wedding day, all the little things that come together to paint the big picture.
welcome to my blog...
About three weeks before my sister’s wedding, I made a snap decision to make this DIY paper flower backdrop from Livia Cetti’s The Exquisite Book of Paper Flowers to hang behind the bride and groom’s table at the reception. Now, this was actually a little bit crazy on my part because I had made hundreds of paper flowers for the wedding during the year AND I wanted the backdrop to incorporate flower types that I hadn’t tried before. Did I mention that I decided this three weeks before the wedding? Yeah, definitely crazy, haha!
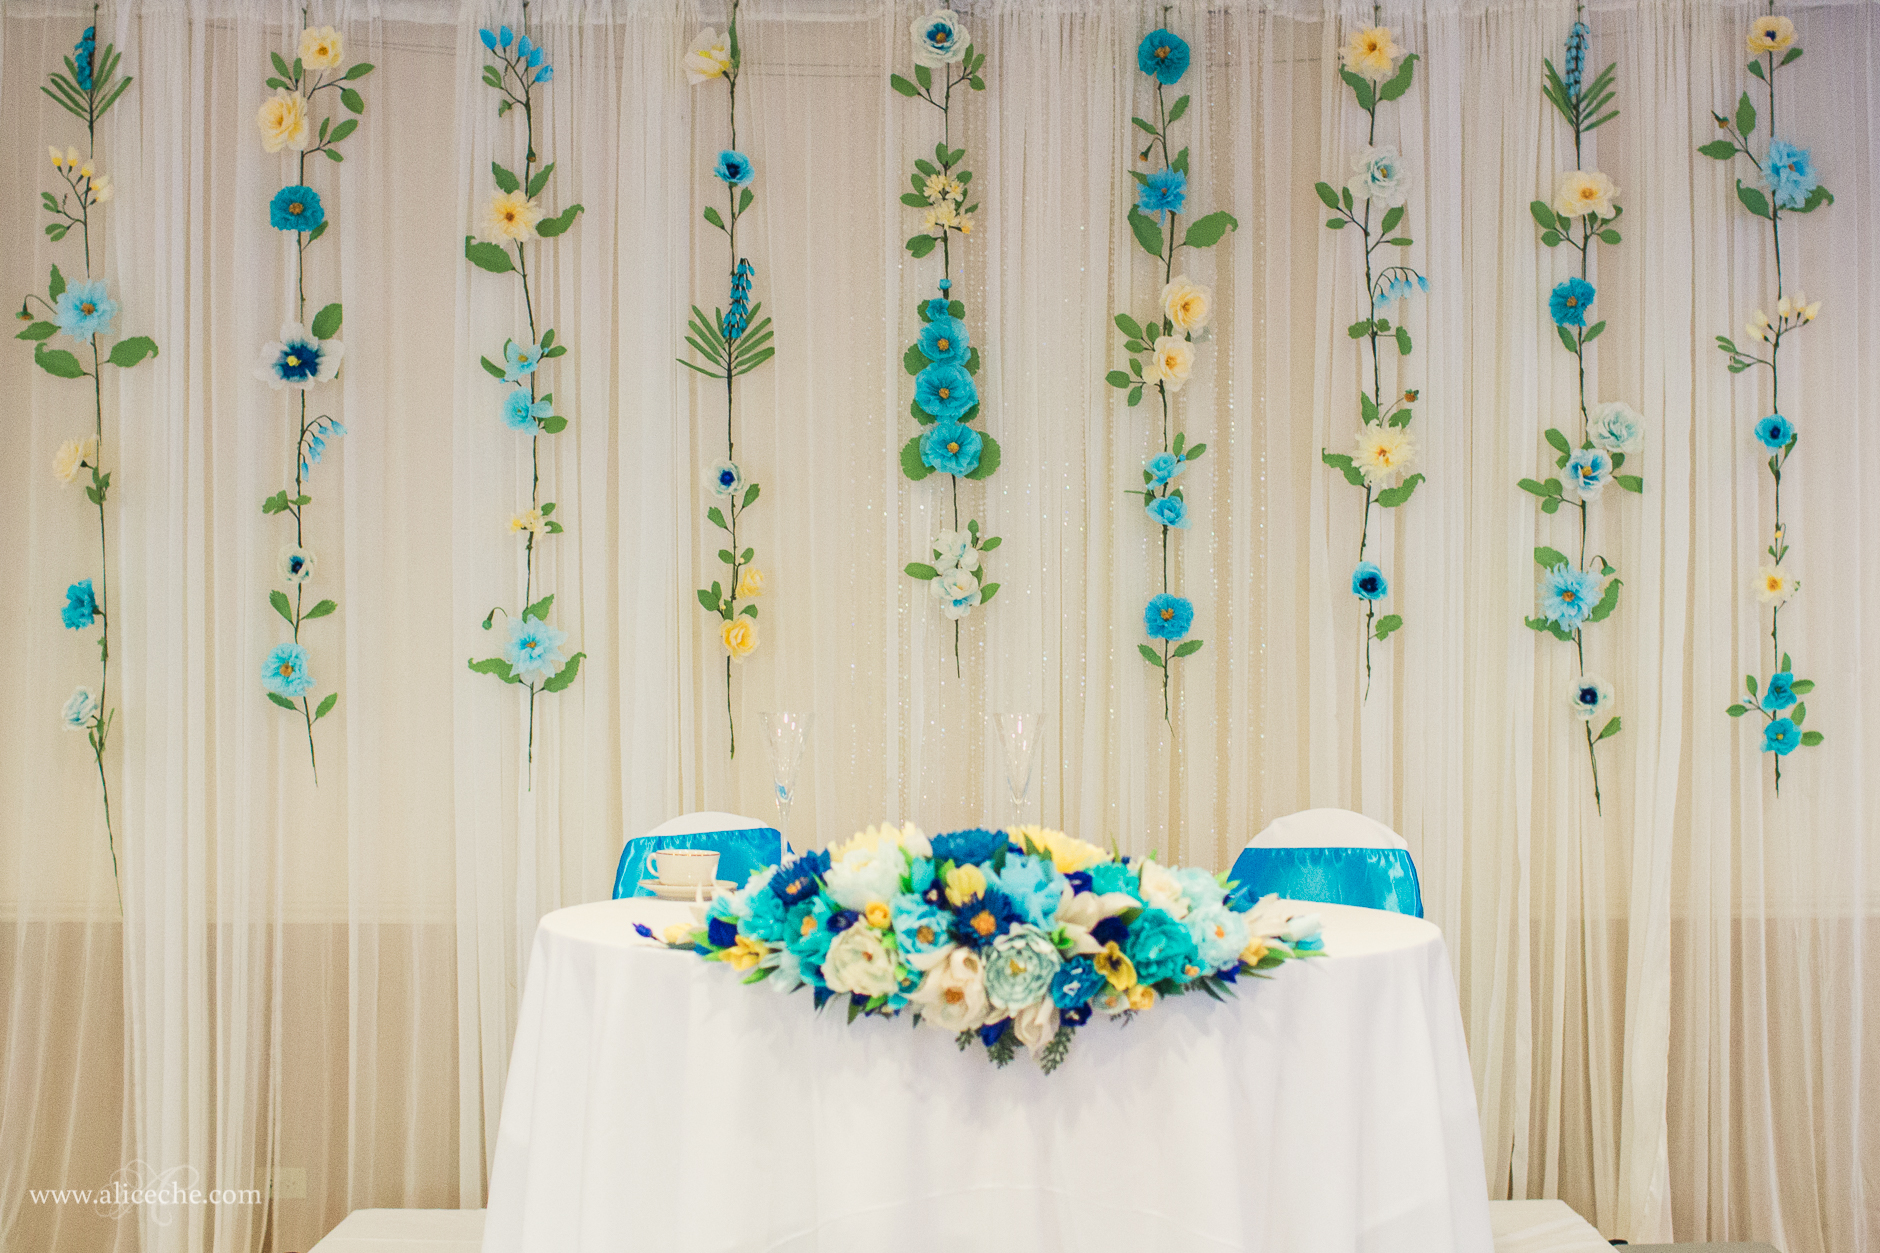
That being said, I am so glad I did it, because it turned out stunning and was one of my favorite details from my sister’s wedding. In the process of making all the flowers and hanging up the backdrop, I learned a lot that I figured I would share with all of you in case you wanted to make a backdrop as well. And, really, it’s a beautiful backdrop and would be perfect for all sorts of occasions even outside of weddings! It’d make a gorgeous backdrop for a photobooth or even just as a display in your living room.
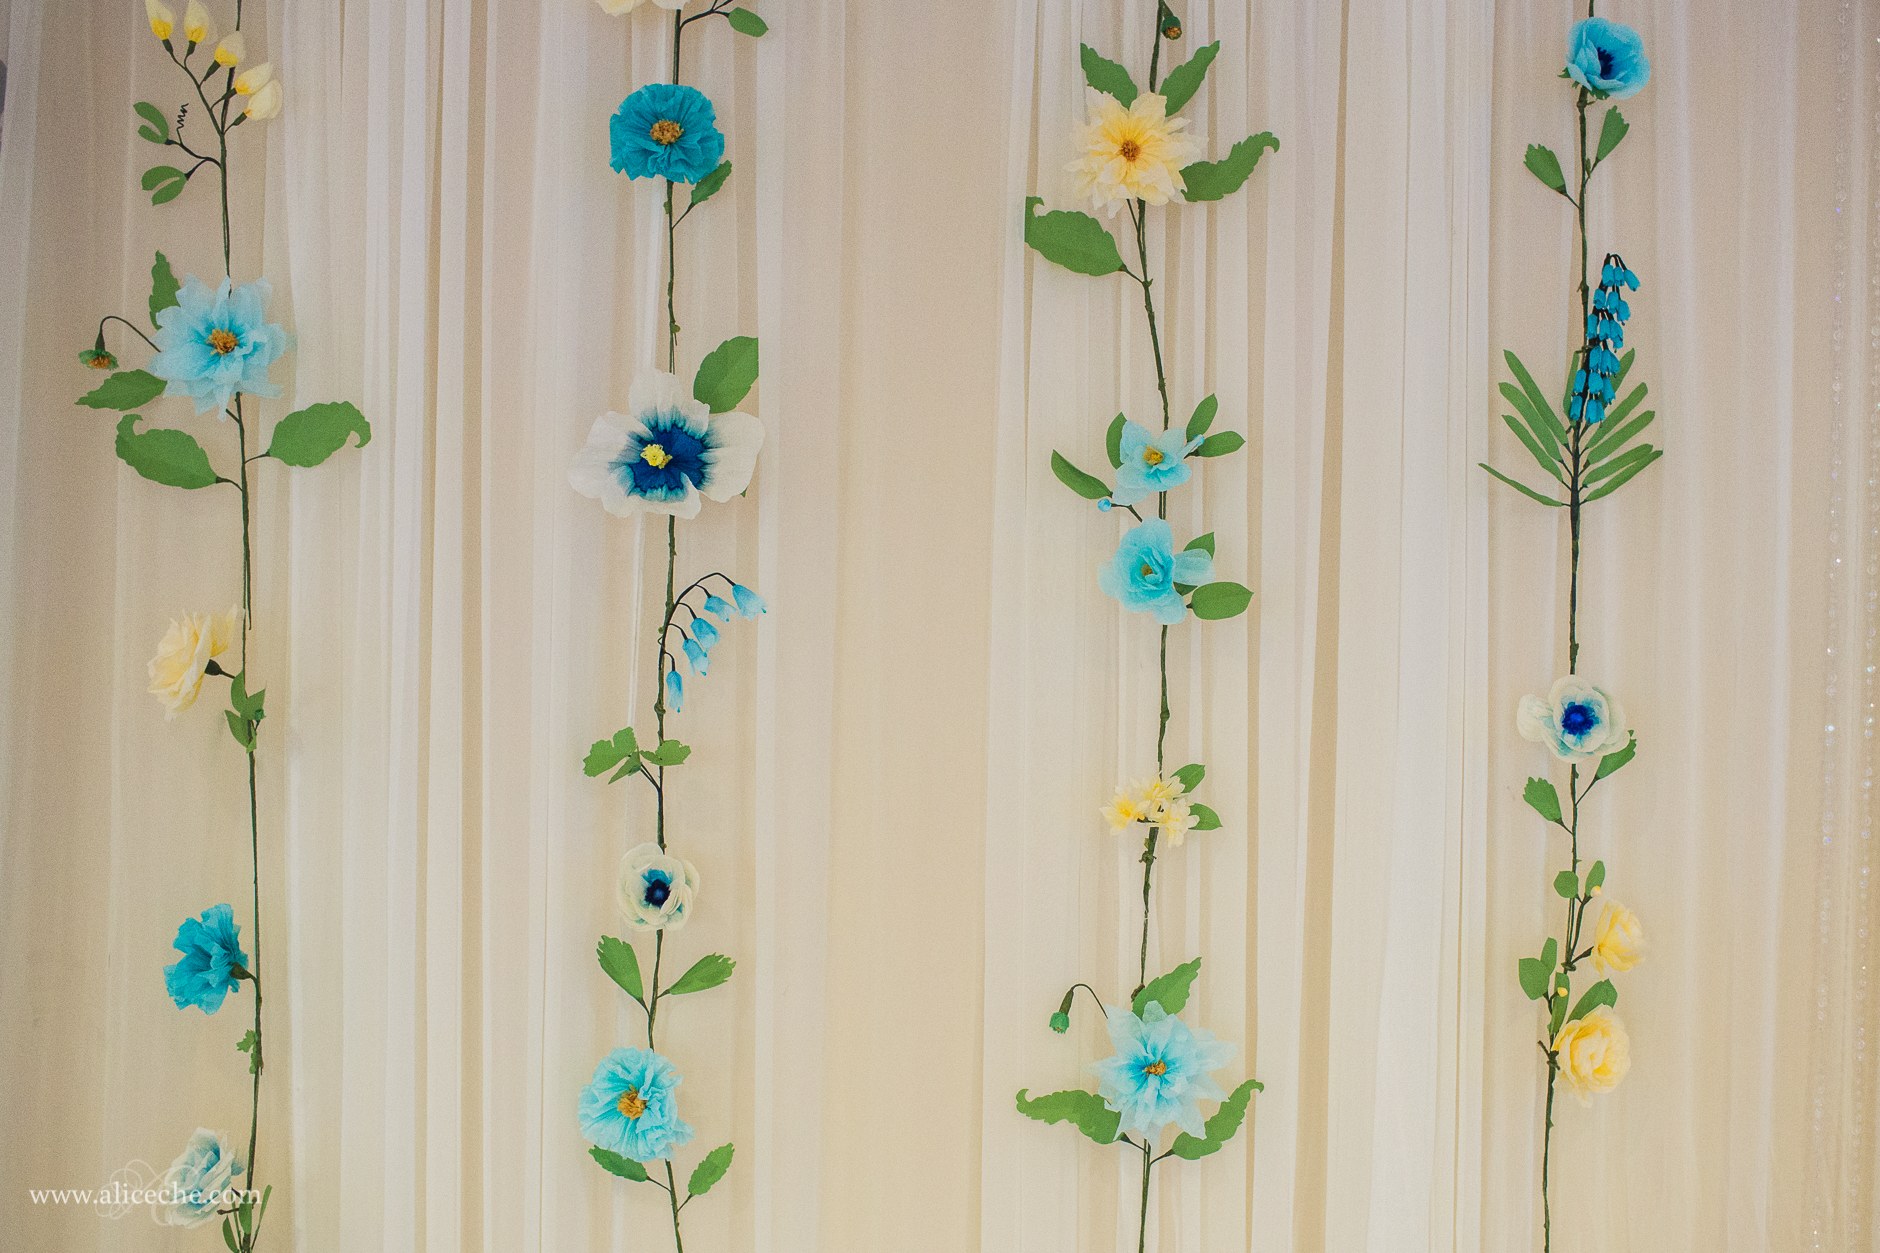
I won’t go into the details for how to make the flowers. Livia’s book has beautifully illustrated tutorials on each and every one of them. I chose to use muscari, sweet peas, dahlias, roses, poppies, anemones, camellias, lemon blossoms, hibiscuses, hollyhocks and japanese anemones in my backdrop, but you could totally do a simpler backdrop with less types of flowers. The muscari, in particular, are quite difficult and time consuming–especially compared to anemones or dahlias!
Here are my biggest tips and tricks for making a stunning DIY paper flower backdrop for a wedding or your next party!
- Try out your color palette beforehand. I made several flowers in a more orange-y/gold color that I was unable to use in the backdrop because they clashed with the other flowers. I also had a yellow flower that was more saturated than the other ones I used that I had to nix because it stood out too much. Laying the flowers next to each other before you commit to making a lot of flowers will help you avoid this problem. You can try cutting out tissue paper and laying that out as well, but I found that it made a difference to have the actual flowers. Use several shades of the same colors to add variety or stick to all one color to create a more monochromatic look.
- If you need to, don’t be afraid create your own colors! Livia creates most of her colors by bleaching tissue paper to get a beautiful gradient of colors. I definitely used this technique a lot… there are only three different colors of tissue paper that I used for the flower petals there! While I love bleaching, it is a bit difficult to control the resulting colors. Another option is to mix your own colors using paint and painting the tissue paper. I painted cream tissue paper with watered down blue and yellow/gold india ink to make some softer colors.
- Don’t bunch up similar colors and flowers. Keep the size of the flowers in mind too! For me, the beauty of this backdrop lies in the variety in both flowers and colors. When I was laying out the flowers, I tried to make sure there were only a couple places where I had two flowers of the same color or type next to each other (whether above, below or to the sides). I also tried to balance out where I placed the differently sized flowers. The poppies and anemones were about the same size to me, while the dahlias and the roses were quite a bit bigger. Having all the dahlias and roses clumped together would have thrown off the balance of the backdrop.
- Do a trial layout before the final hanging! I did this a couple times while making flowers to decide what kind of flowers to make. I would realize that I needed another yellow sweet pea or that I didn’t need any more poppies or anemones. It is also helpful to know exactly how big your backdrop needs to be. That way you can do any prep work for hanging the flowers beforehand.
- Make sure you have enough time to hang the backdrop… and have a backup plan! In Livia’s book, she uses washi tape to tape the flowers to the wall, but I knew that that wouldn’t be an option at my sister’s wedding venue. I knew that the venue was providing a fabric backdrop, so I figured I could create a wire loop and string the flowers through. Fishing wire ended up not being the best idea because it stretched, causing the lines to sag in the middle. It was also difficult to tie a tight knot. Luckily, we had some green twine as well and I used that instead, otherwise I would have been pretty screwed! My second difficulty was with getting all the flowers in each column connected. At first we had long lengths of the green twine that we tied the flowers to. The problem with this was that the flowers would twist to the side. To prevent the twisting, I ended up using floral tape to tape each flower to the wire of the one above it. This was all incredibly time consuming… and since I didn’t know how big the backdrop needed to be before we got there, I literally had no idea what the layout would look like and had no prep work done. I just had vases and vases full of flowers. Since I had done no prep, I also had to figure out the layout before I did any of this. And I was the maid of honor, so I had to get ready! I ended up having almost no photos with my sister because I was running back and forth trying to get the backdrop set up. It would have been much better to have had a solid plan and some practice executing it BEFORE the day of the wedding.
I hope that was helpful! Please let me know if you have any questions about the process and definitely come back and share photos of your backdrop if you end up making one! Check back once in a while, because I’m planning on creating some more paper flower related tutorials <3
Alice Che is a San Francisco Bay Area photographer specializing in wedding, engagement, couple and boudoir photography. Serving the South Bay, Peninsula, and East Bay: San Jose, Sunnyvale, Mountain View, Palo Alto, Redwood City, San Carlos, Burlingame, Los Altos, Milpitas, Union City, Fremont, Berkeley, El Cerrito and surrounding areas.
DIY Paper Flower Backdrop – Tips and Tricks


